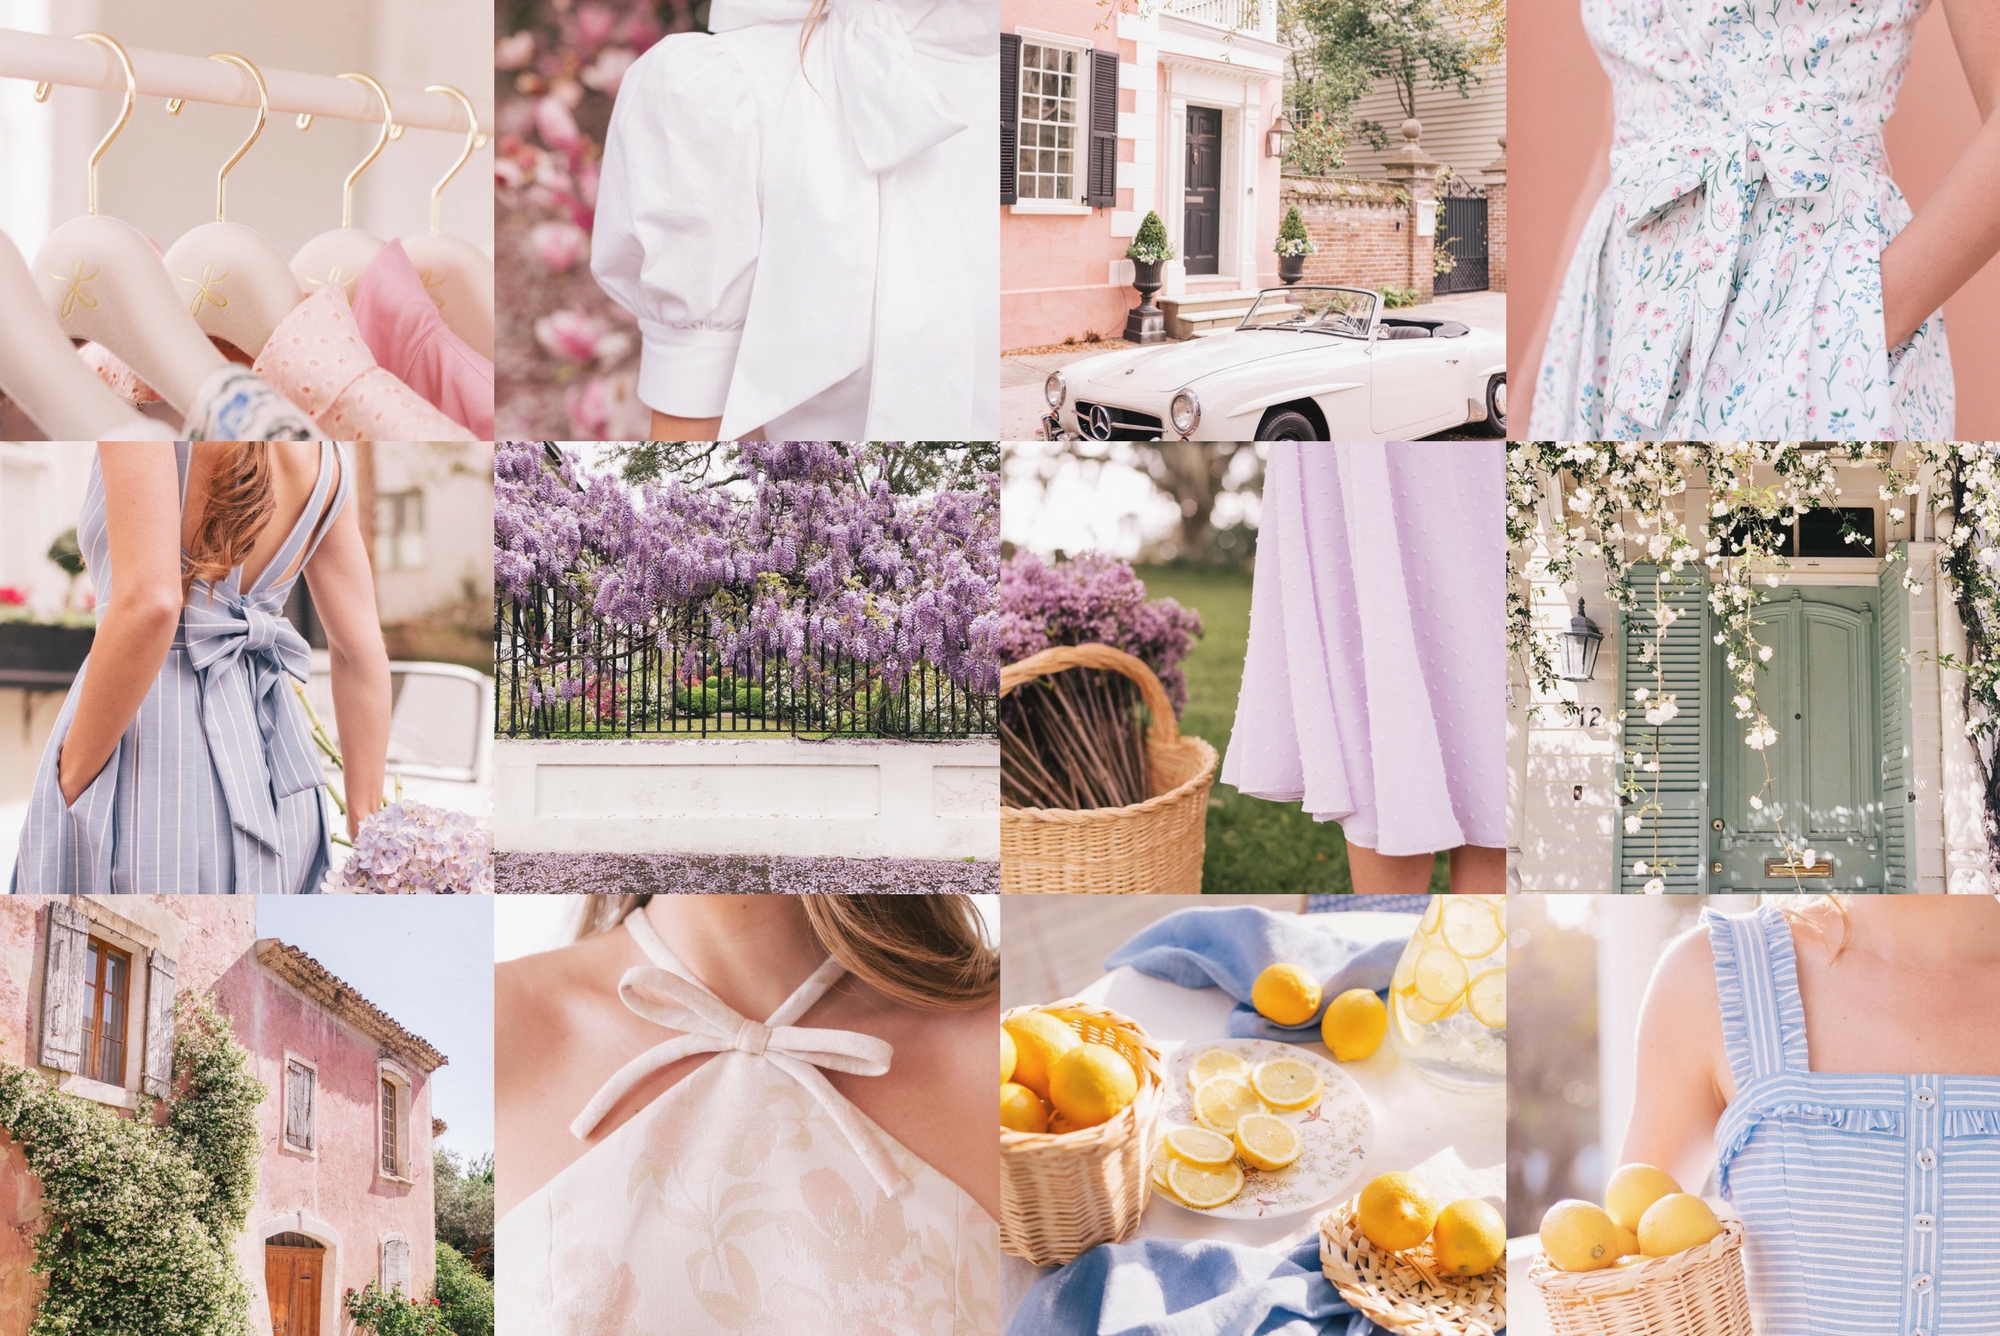
Most people assume that because Thomas shoots almost all (I take some too!) of the photos for both the blog and Instagram, that he also edits them. He gets people reaching out all the time asking if he could teach them how to edit or write a post on what his process is. But, truth be told, I edit them all! Over the past seven years I’ve really figured out my editing style, but that came with a lot of trial and error and practice along the way. When we first started Gal Meets Glam, we used a $150 point and shoot camera and didn’t know a thing about proper photography, let alone editing. Everything we know is self taught and was learned through our combined passion for the blog. In the beginning, there were many frustrating moments while we were still learning, but because we were continually trying to improve our skill almost every single day for GMG, our knowledge grew quickly along with our love for photography (especially for Thomas). If you’re currently learning or want to learn how to take better photos, Thomas posted this ‘Photography Guide For Beginners’ a few months back.
There are a few different apps for editing on your computer, but the only one I use is Lightroom. I’ve been using it since 2012 when we really started to focus in on our photography. I am by no means an expert at it, and there are so many elements and tools that I still have no idea how to use, but I have my preferred process down. I pick up small tips here and there from photographer friends, but for the most part, I don’t sway from my simple system. So, here is my step by step process on how I edit my images for both the blog & IG (with some examples, too!):
Editing For Blog Photos:
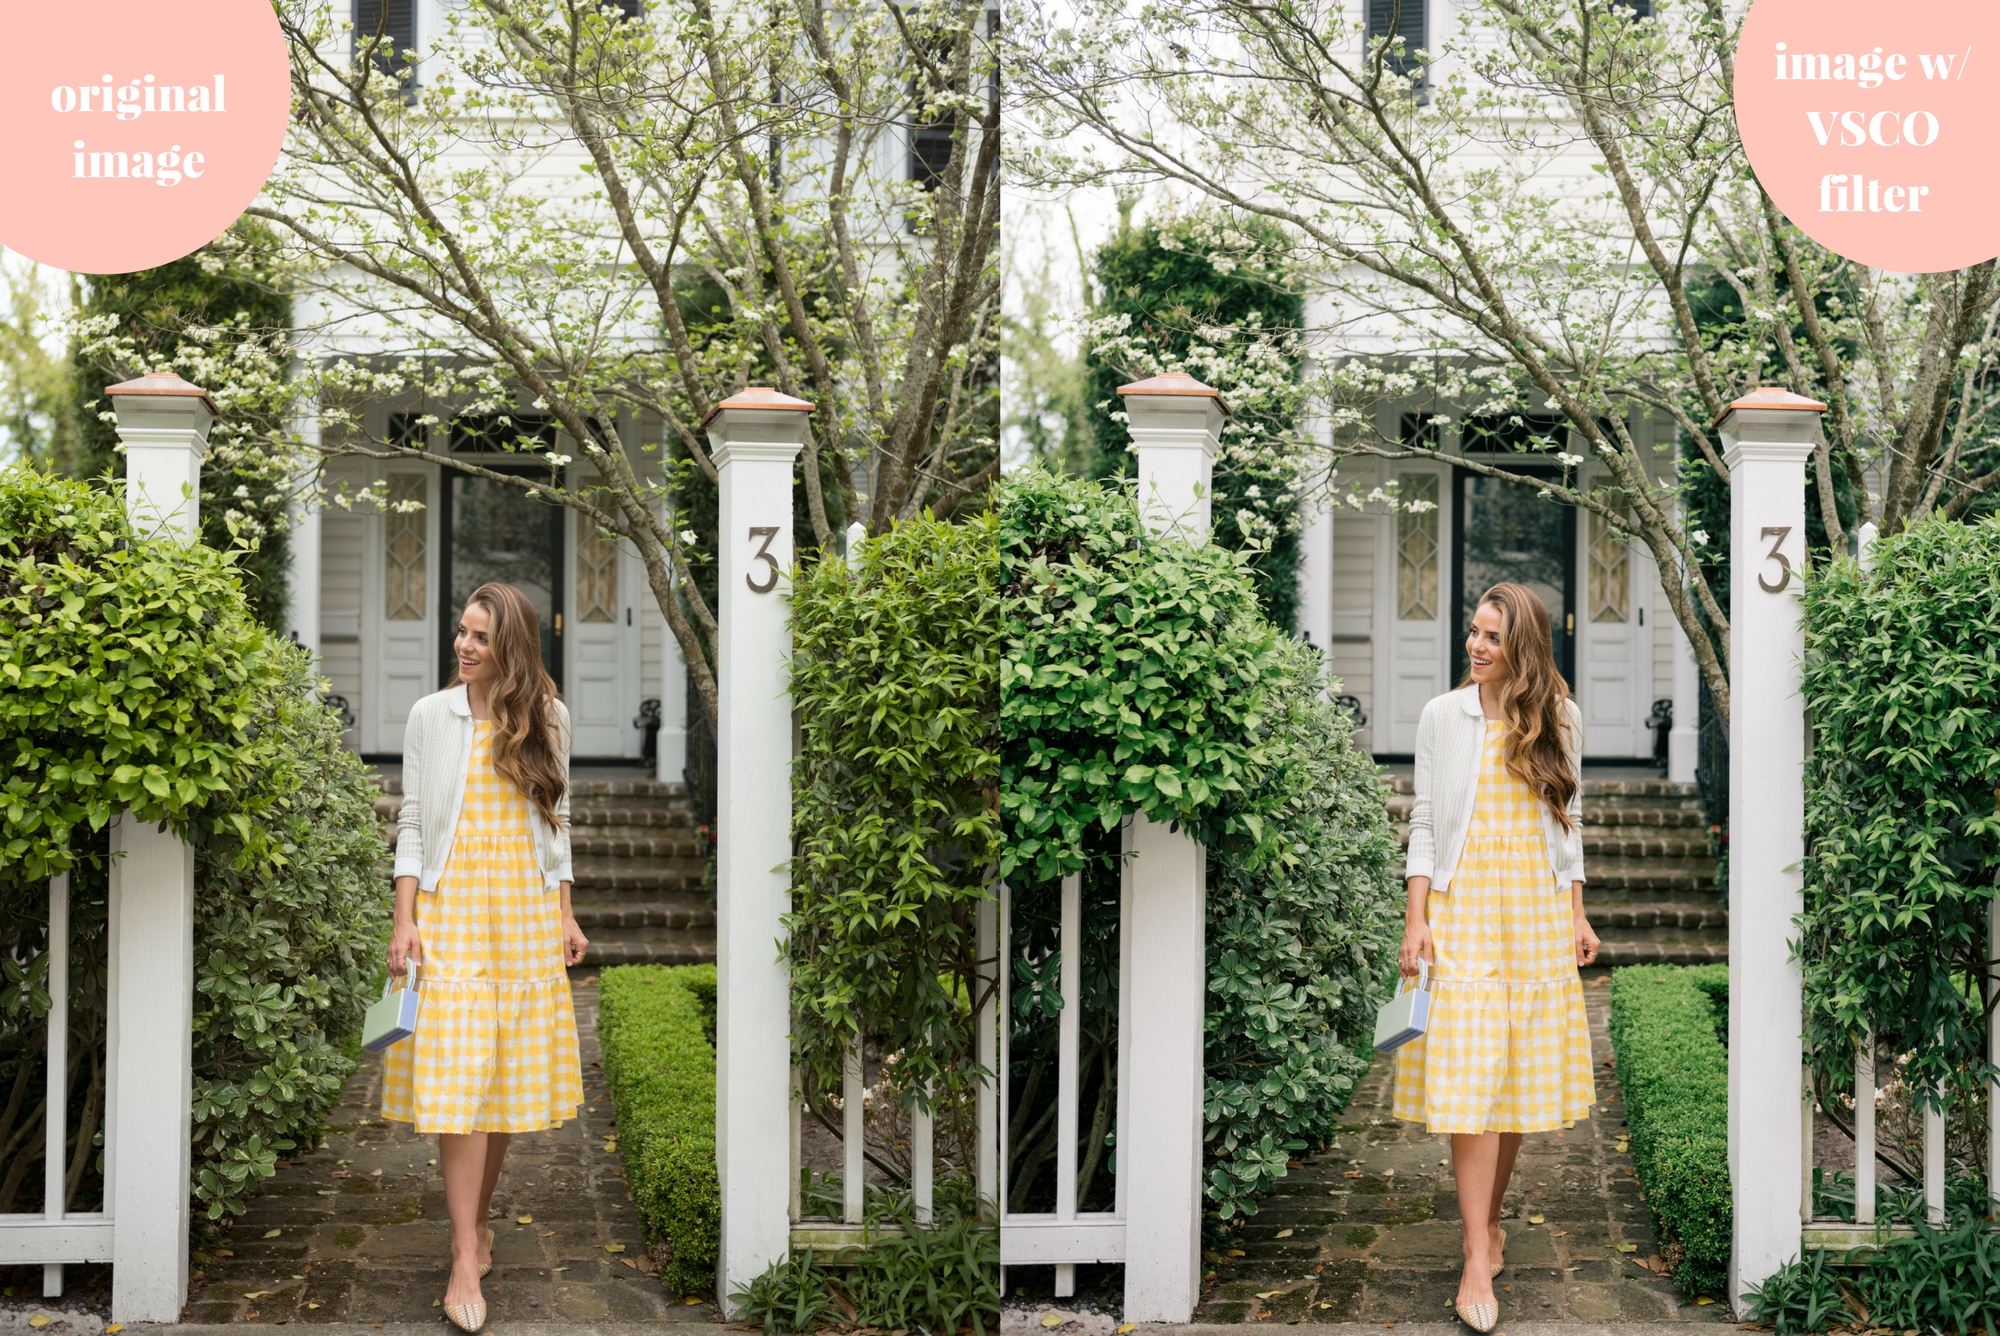
I always start with a VSCO filter in Lightroom. I think they’re a great base and jumping off point. As I mentioned above, I’ve only learned how to edit through practice and I don’t like anything complicated. I have a ton of photos to edit at all times (now for both the blog and GMG Collection), so I have to have a process that’s quick and works.
My favorite VSCO pack in Lightroom is the VSCO Film 02 – specifically the Kodak Porta 400VC- filter. That’s generally what I use 99% of the time.
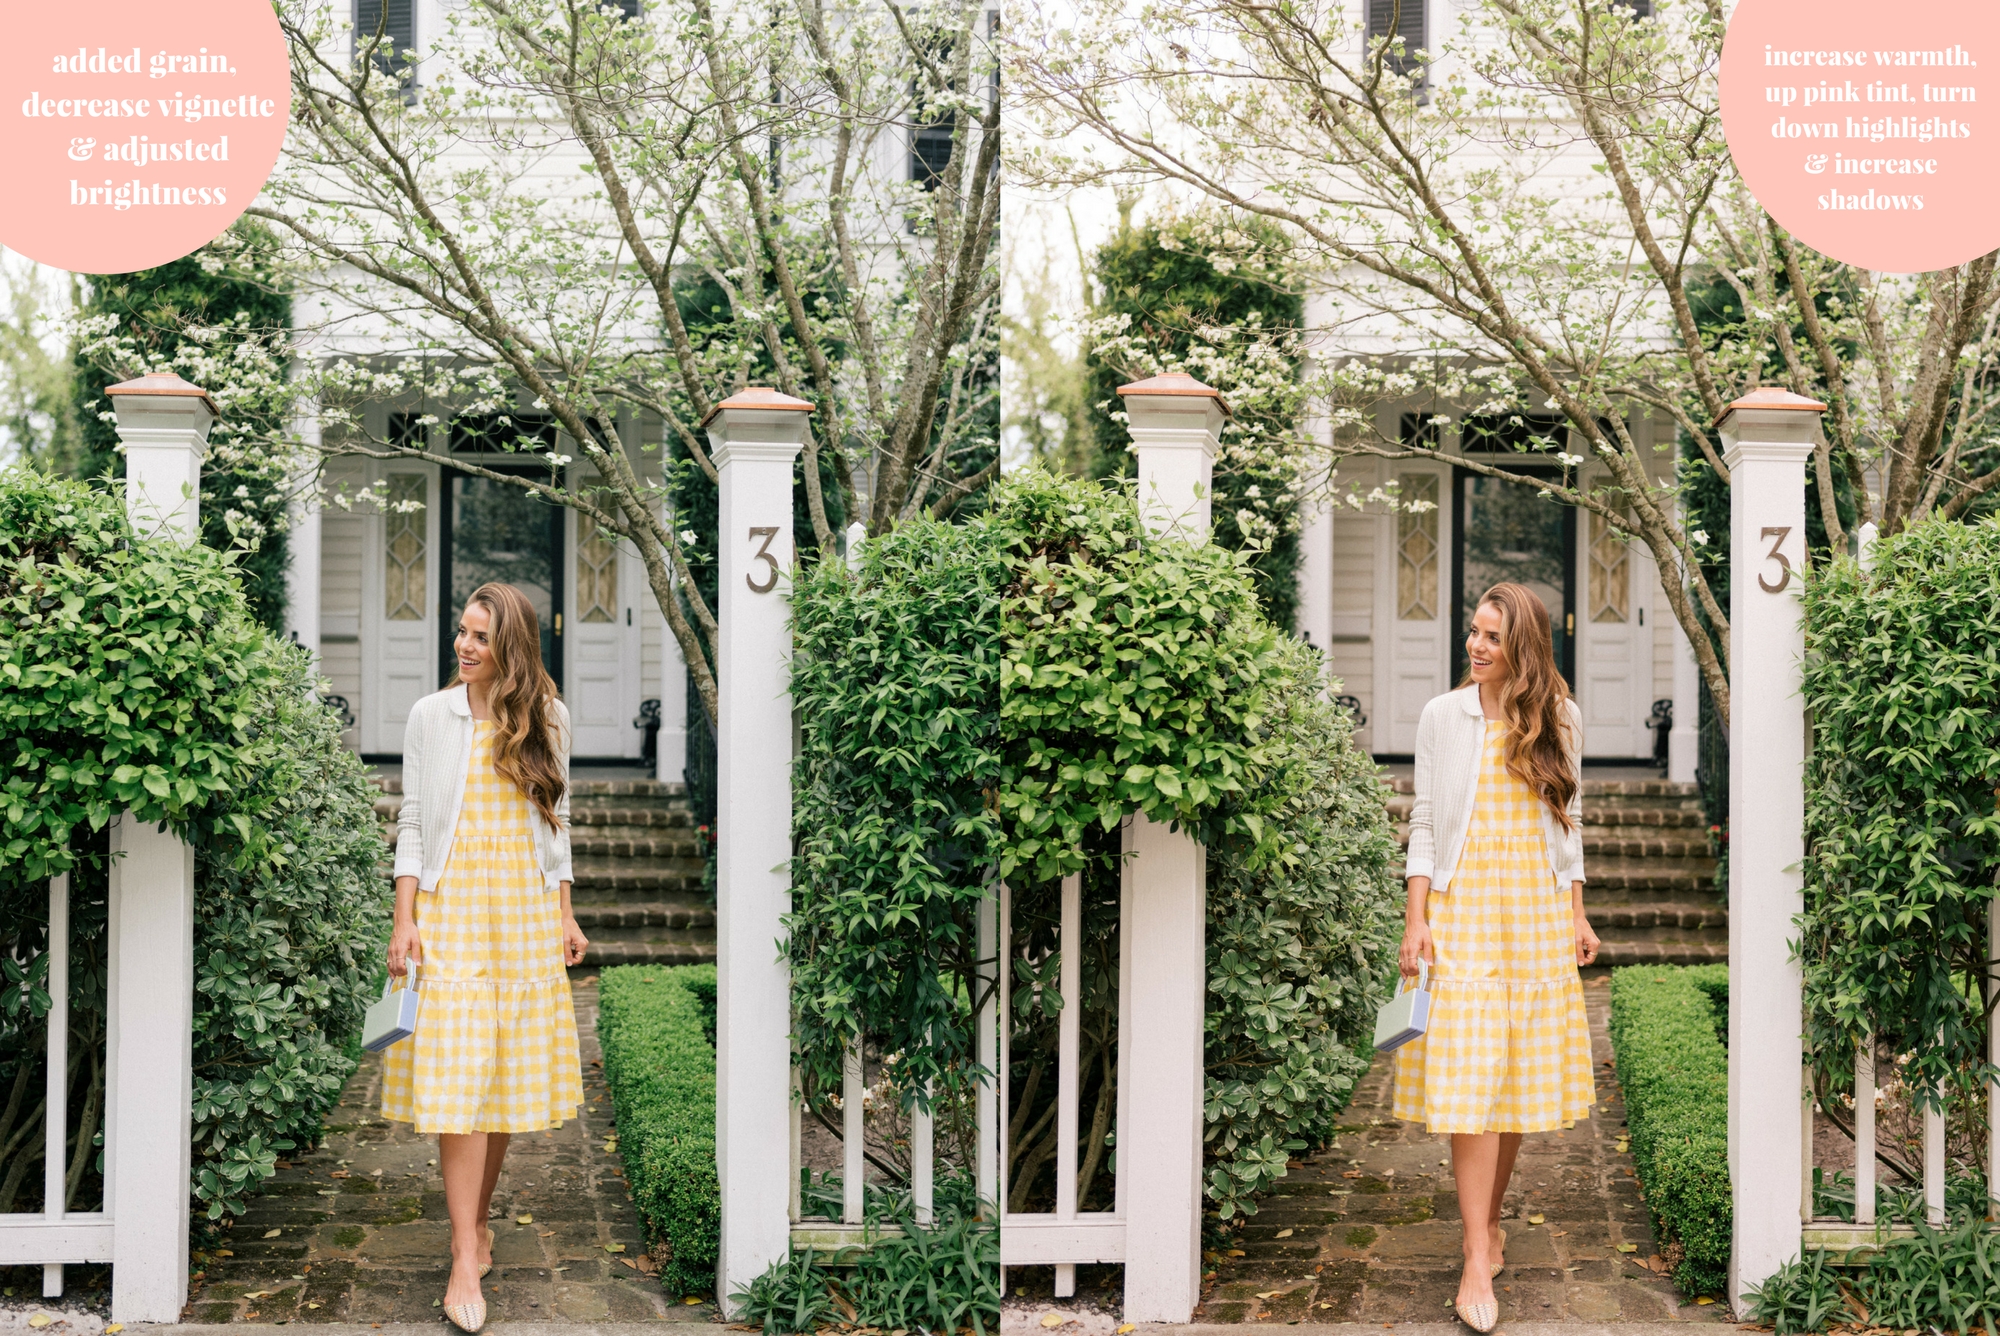
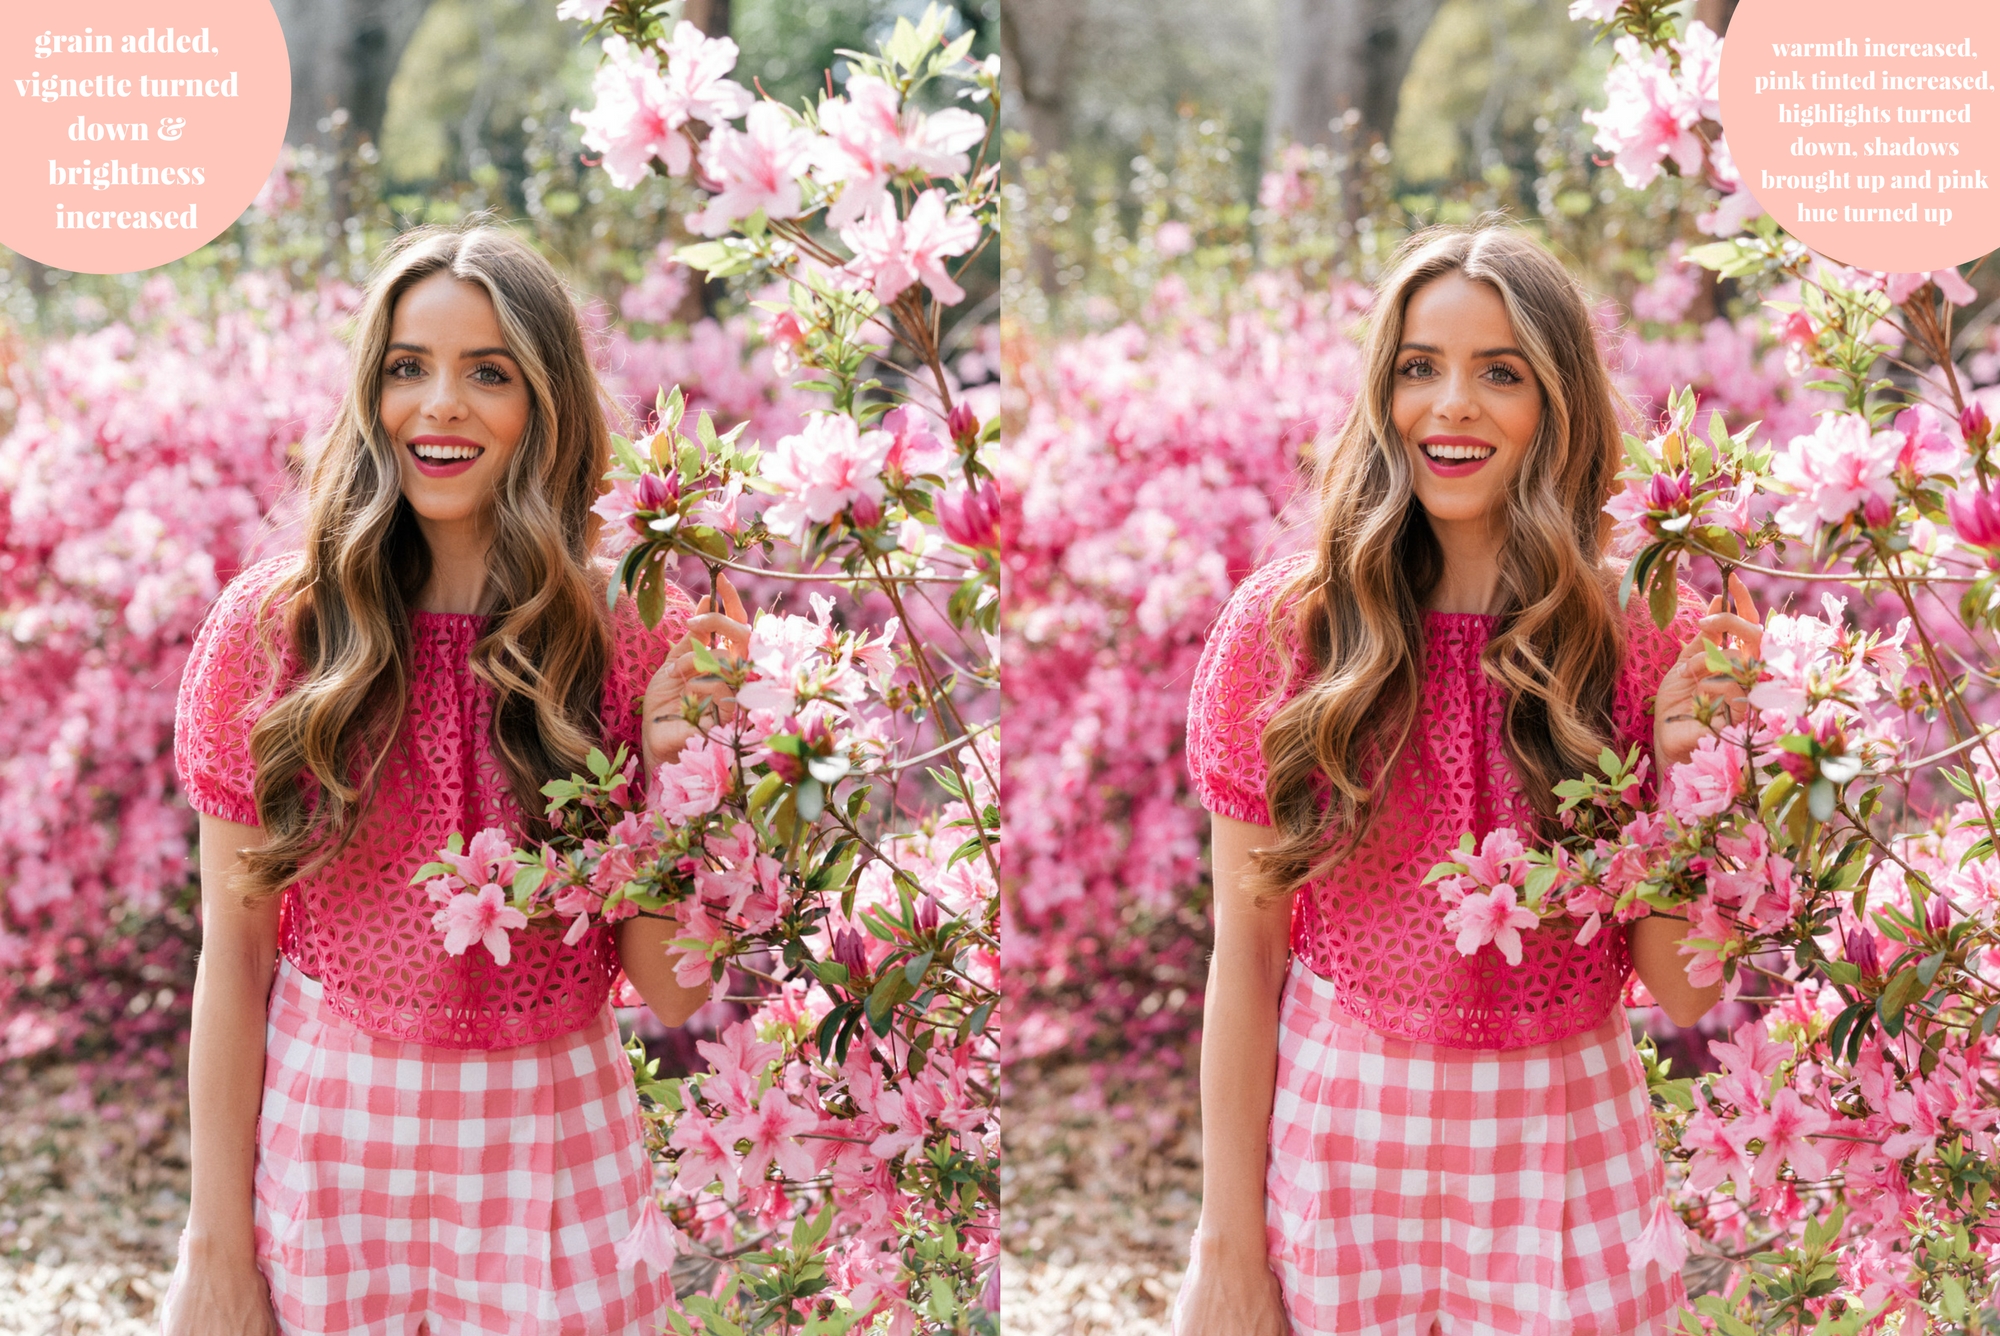
My first tweak is always adding a tiny bit of grain to the photo and eliminating the natural vignette that the camera makes. After that, I adjust exposure. Most of the time Thomas nails the exposure on the head so I don’t really have to adjust, but I do like my photos bright, so I usually add a tiny bit of brightness.
Next, I adjust the warmth. I love warm photos. This means I turn the temperature a bit more to the yellow tones vs the blues. I don’t go too overboard with warmth though because I never want anything to look orange.
After warmth is tint. The tint is what give my images that “pink” hue that people always ask me about. I prefer to eliminate the green glow in my photos and add more pink tint to each.
From there, I bring down my highlights just a tad (again, depends on the photo) because I don’t love my whites super white and I also like to get a little bit more color in my face when I do so.
After that, I usually bring up the shadows a bit. Like I mentioned above, I love photos that are bright and airy and I usually get rid of any darkness that feels really heavy by bringing up the shadows.
One step that I sometimes do, but not on every photo, is adjust the colors. I like for my colors to look as close to the real life thing as possible. An image never looks as good on camera as it does in person, especially beautiful landscapes! Sometimes I’ll go in and tweak a red if it’s not photographing right or I’ll bright up the pink hues if they’re looking dull. Again, I don’t do this in every scenario, but sometimes it’s necessary to make the photo pop!
Note, each photo is so different and requires unique variations of tweaks. Although I use the same ‘process’ on each photo, the steps vary because of all the different elements within the photos, like light or color or whether it’s indoor or outdoor. Light is the key to good photography! Bad light=need more editing work. We’re always trying to get the best light. Below I have two examples of different types of light- the first is a dull light on an overcast day and the second is a bright back light.
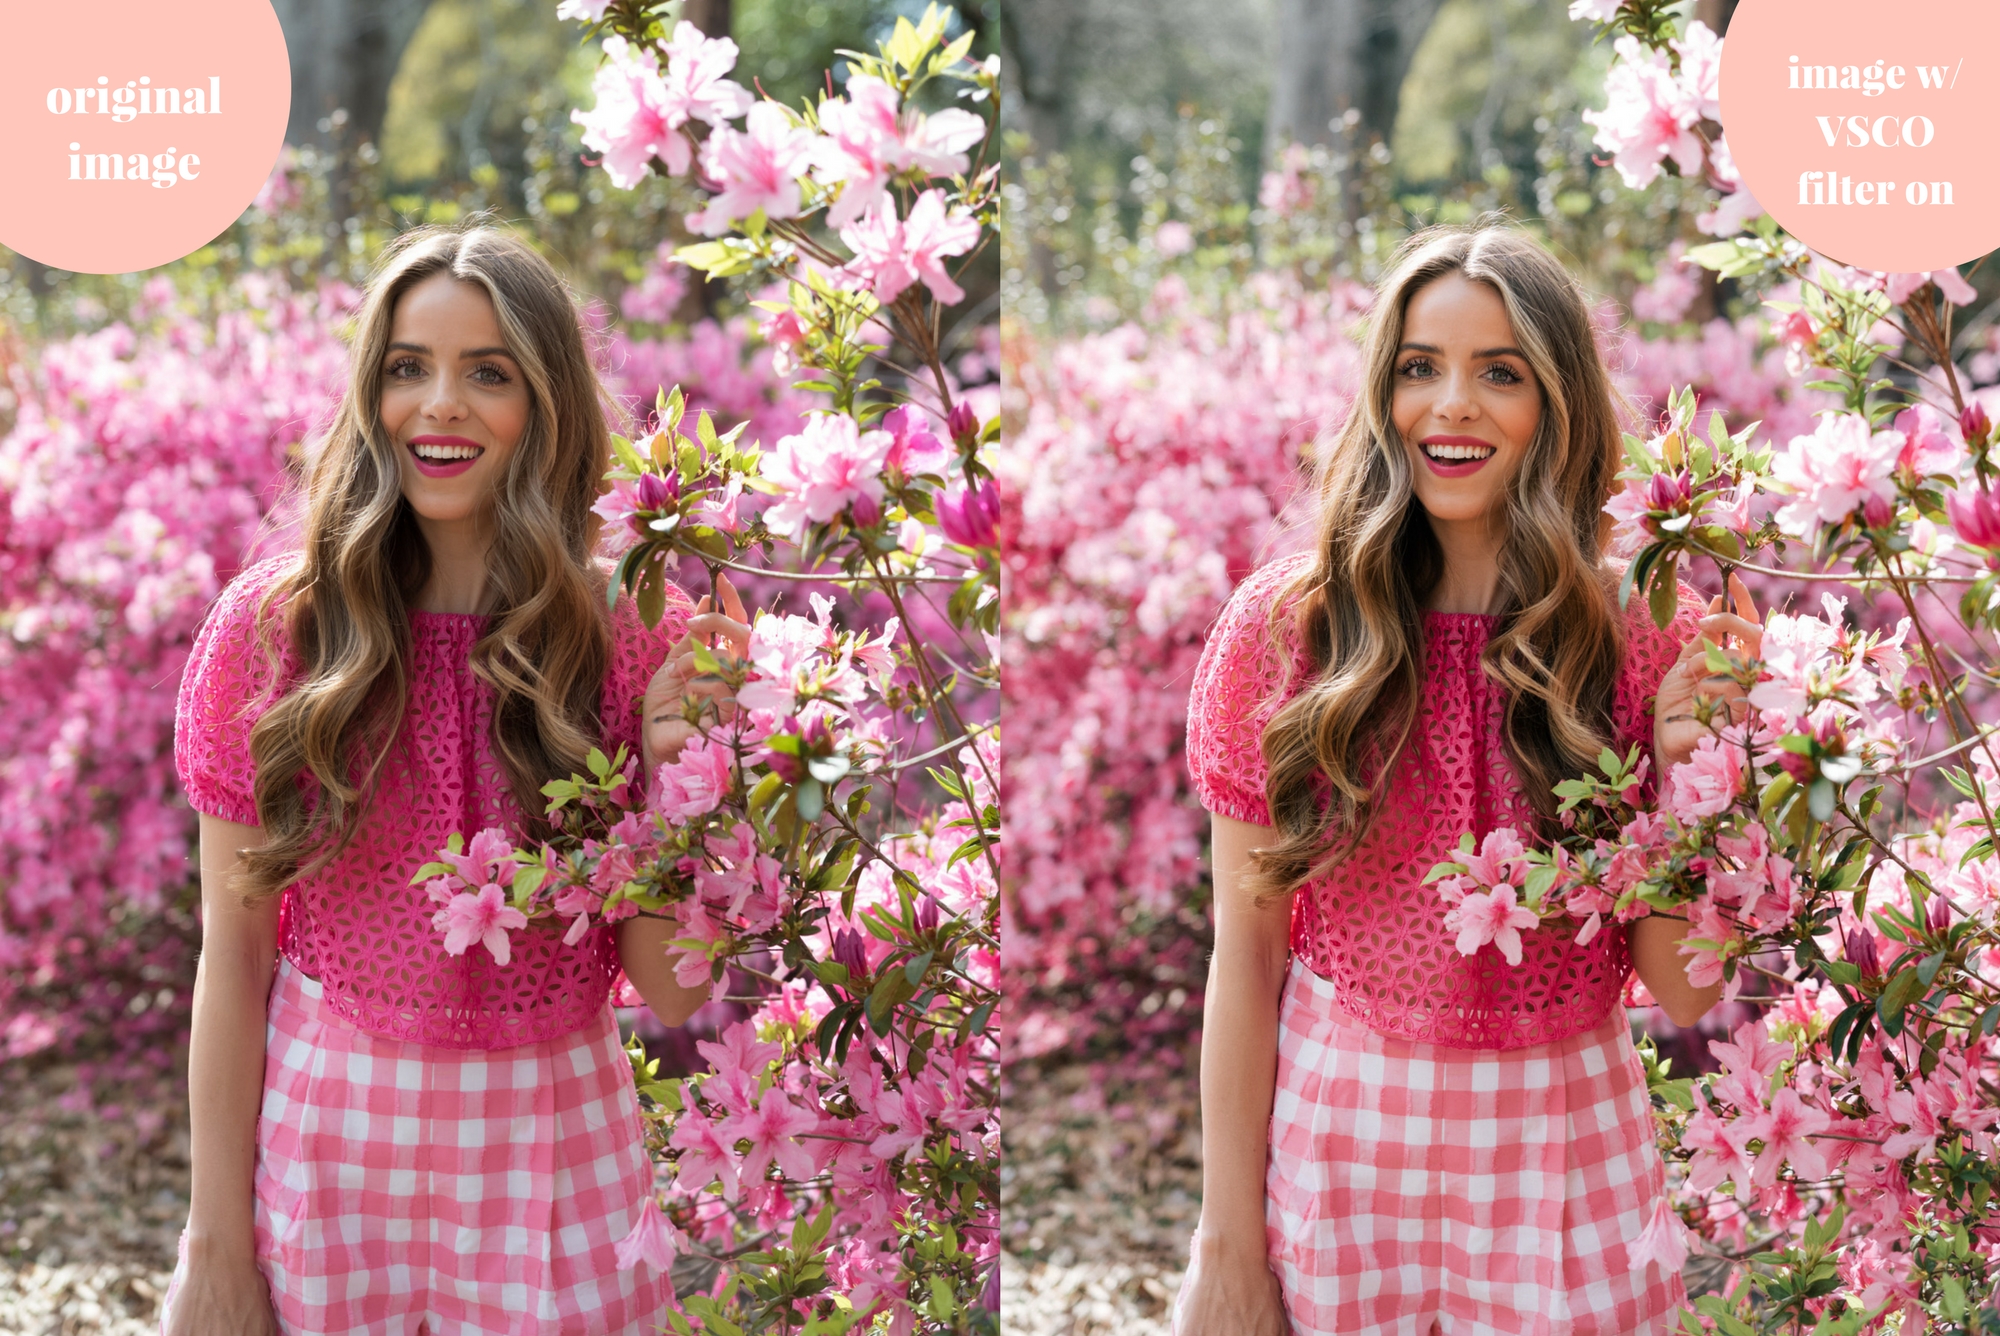
And here is another example where we had some really nice backlight (my favorite) and great natural color from the flowers. The editing was mostly the same with a few slight adjustments to make the pinks pop and less warmth than I added above (because the backlight naturally made it warmer).
Editing For Instagram:
When it comes to editing for Instagram, my editing depends on what camera the photo is coming from. If it’s come from our DSLR or Leica (which are probably 80% of them), I do the same editing as above.
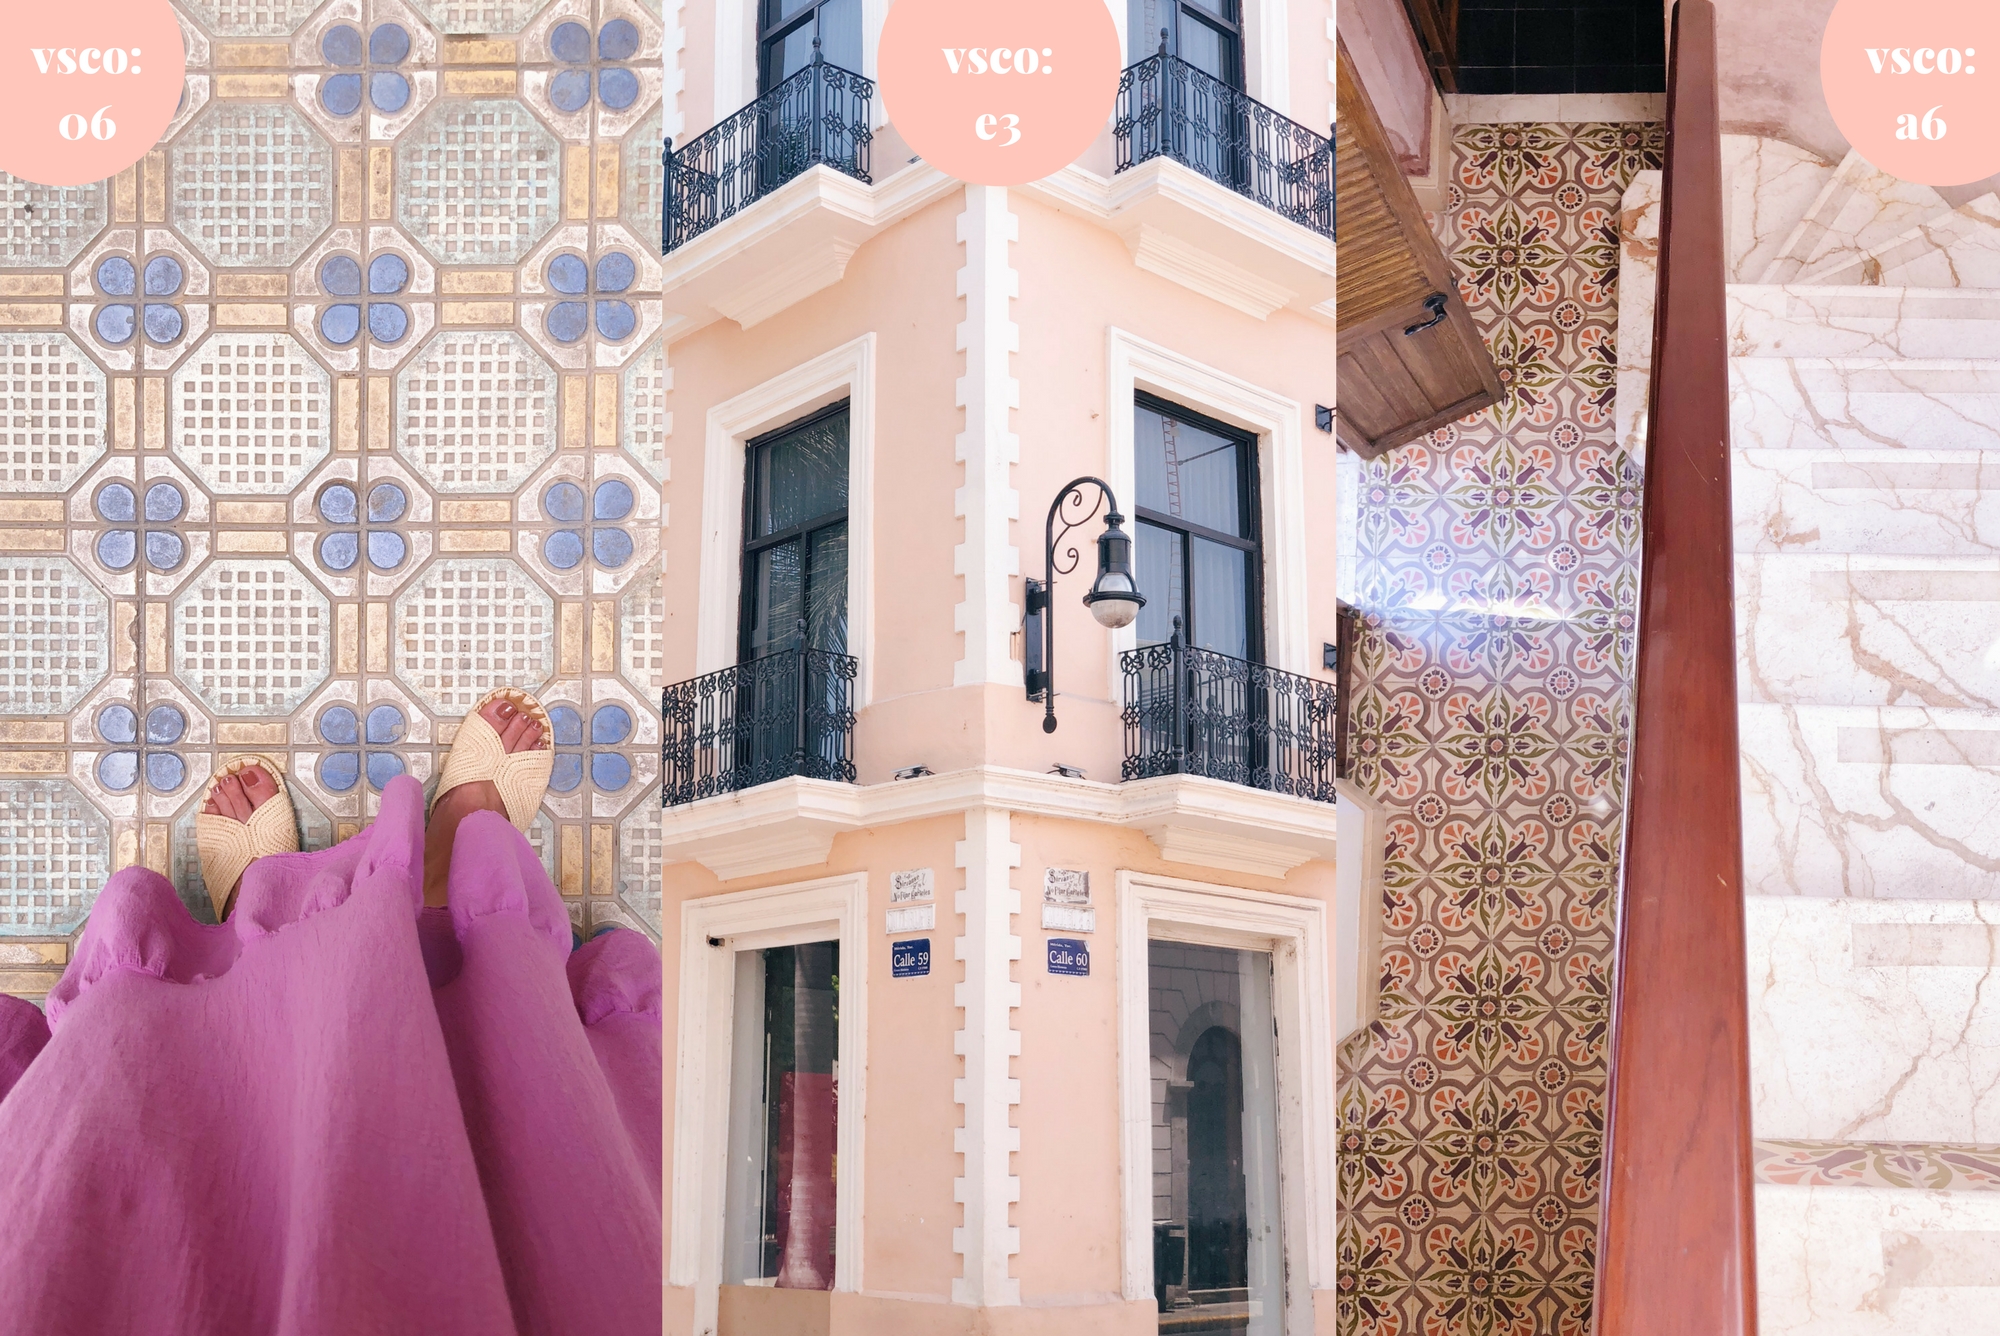
If the image is coming from my iPhone, I use the VSCO app and use a mix of tweaking using their editing tools and add a filter to get a similar style to the one I use in Lightroom. My favorite filters are A6, 06 and E3. Before I add the filter, I usually bring up the exposure, up the temperature and bring out the pink tints. I then add one of the filters- I’ve been using E3 the most recently.
That’s it for my editing techniques! Let me know if you have any questions!
